
Trilobite
0.9.3
User Guide
|
|
Trilobite
0.9.3 |
|
|
|
|
|
Trilobite
offers control features for external Midi hardware and Digital
Audio Workstation (DAW) automation.
These features enable mapping Midi
Continuous Controllers (CC), Midi keystrokes, and DAW
plugin parameters to parameter
sliders and other controls within the Modular
Synth Panel Section.
This page describes the various mapping modes, support menus, and persistence features of Midi and Parameter Mapping. Note that most of the features ascribed here to Midi CC value mapping also apply to automation parameter mapping. Trilobite Plugin examples on this page will use Ableton Live. Midi examples will feature the Korg Nano-control series.
Topics on this page include:
Midi Hardware
Midi
CC Mapping Mode
Plugin
Host Parameter Mapping
Unmapping
Widgets
Midi Key
Mapping Mode
Midi
Map Options Submenu
Midi
Auto Map Submenu
Midi
Map Persistence
Attaching and configuring hardware or software midi devices to your system or plugin host software is beyond the scope of this user guide. Please consult your device manual(s) for help in this regard.
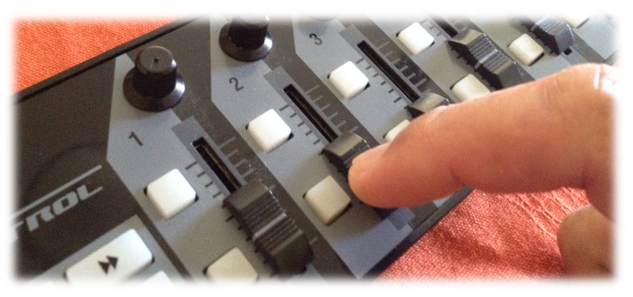
Trilobite performs a scan of Midi devices attached to your system when launched, and will probably remain unaware of devices which are attached afterwards. To test whether an external device has been successfully detected by Trilobite, watch the MIDI Signal Meter while manipulating any Midi Continuous Control (such as a knob) on your Midi device. If the meter shows green levels of data during the action, then your device is ready to be used for midi mapping.
This technique also works for testing detection of MIDI keyboard input: play midi keys while watching the meter.
This page discusses how to control Trilobite synthesis using external physical Midi-capable hardware in broad terms. While this user guide does use the Korg nanoSeries as example devices, the instructions are intended to apply to any other continuous control device.
Midi CC Mapping Mode allows a continuous control from an external midi device or a Plugin Host parameter to be mapped to various sliders and button controls in the Modular Synth Panel Section. To enter this mode, click the Map Midi CC Mode Button.
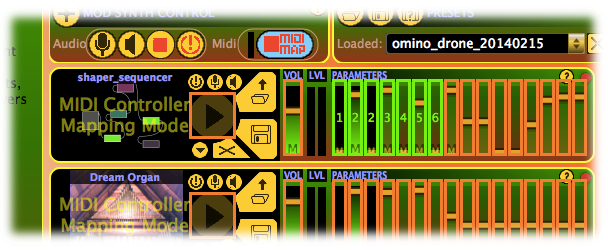
Once in Midi CC Mapping Mode, all controls which may have external control mapped to them are highlighted with an orange border and all Patch Thumbnail Windows will display the text “MIDI Controller Mapping Mode”:

To
map a single Midi continuous control to one of the highlighted screen
widgets, click anywhere within the orange bounding box of the target
widget (most controls will be disabled for direct mouse control while
in this mode). Once clicked, the bounding box color will change to
green and begin to flash, and a numeral indicating the order in which
this box was clicked will be painted over the top of the widget:

The
flashing border indicates that the selected widget will be mapped to
the next continuous control to change value. To map a Midi control,
move one of the knobs or sliders on your attached midi device. Once
this occurs, the widget border color will again become orange, the
numeral will vanish, and the control will be highlighted with a
capitol letter M to indicate that the widget has been mapped:

Trilobite
includes a multi-mapping feature which allows multiple parameters to
be mapped easily. If you wish to map a range of parameters all at
once while in Midi CC Mapping Mode, click on the range of parameters
in the order you wish to map them, as in the following example where
eight consecutive parameters will be mapped:
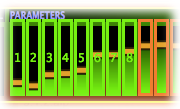
Once
these eight parameter sliders are selected for mapping, briefly move
the eight physical controls on your midi device which you wish to map
in the same intended order. As each physical control is moved, note
that the corresponding numbered border will be restored to orange and
the capitol M highlight will be drawn over the slider.
|
|
X-Y Controller Mapping Note that the multi-parameter mapping feature just described is the best solution for mapping an X-Y controller (such as pads on the QueNeo controller, for instance). To achieve this, simply click on the two parameters you wish to map, as described above, then generate a diagonal sweep on the physical X-Y controller. The two parameters will be mapped to the X and Y coordinate values. |
To exit Midi CC Mapping Mode, click the Stop Midi Map Button to save the mapped state to the current Preset:

Midi CC Mapping Mode is also used for mapping Plugin Host accessible parameters to Modular Synth Panel widgets.
When used as a plugin, Trilobite exports 32 general purpose unmapped parameters to the plugin host application. These parameters are named simply “TRLO_PARM N”, where N is in the range [0, 31]. How these parameters are accessed and displayed depends entirely on the Plugin Host software you are using. In this example, we use Ableton Live 9 Intro Edition.
In Ableton Live, once you have dropped Trilobite_plugin into a MIDI track, click on the Unfold Device Parameters Button of the Trilobite_plugin control panel to see Trilobite's exported parameters:

Place
Trilobite into Midi CC
Mapping Mode, and as described in that section select one or more
highlighted parameter widgets to be mapped. Mapping a plugin
parameter is analogous in most ways to mapping a Physical Midi
Controller, and in some plugin hosts may be one and the same. Once
you have selected one or more interface widgets to be mapped,
manually manipulate the host parameter slider values (as pictured in
the Ableton example above) to map parameter inputs, exactly as you
would have with physical Midi controllers.
While in Midi CC Mapping Mode, all parameters and Midi CC controls mapped to an individual Trilobite widget may be unmapped by right clicking within the orange boundary of that widget to invoke the following pop-up menu:

Once
selected, the remove all mapped to this menu option will unmap
any Midi Control or plugin host parameters targeted to the individual
widget. The capitol M marker on that widget will disappear to
indicate that the widget is not mapped.
Midi Key Mapping Mode allows specific ranges of Midi keyboard NOTE-ON/NOTE-OFF events to be mapped to Renderers running in individual Modular Synth Panels. In other words, with this feature you can map different octaves on a single Midi Keyboard to different patches running in Trilobite. To enter this mode, click the Map Midi Key Mode Button.
Once in Midi Key Mapping Mode, the Patch Thumbnail Window of each Modular Synth Panel will be highlighted with an orange border and display the text “MIDI Key Mapping Mode”:

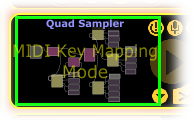
To map a key range from your Midi Keyboard to this Patch Renderer, Click within the orange rectangular border and wait for the border to turn green and begin flashing:
Mapping
a range of midi keys to this Modular Synth Panel is now a two stage
process. For instance, to map a one octave range of keys from F1-F2
on a Korg nanoKEY2:
1. Press and hold the F1 key:

2. While still holding down the F1 key, Press the F2 key:

At
this point the green rectangular border around the Thumbnail Window
should stop flashing to indicate that the range of midi keys has been
successfully mapped.
To exit Midi Key Mapping Mode, click the Stop Midi Map Button to save the mapped state to the current Preset:

A Midi Map Options Submenu is accessible from the Options Menu Button in each Modular Synth Panel.
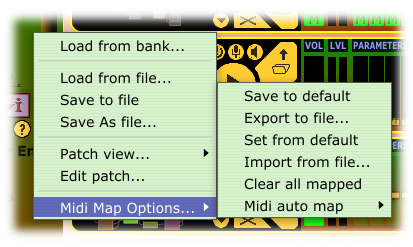
The
submenu options include:
|
Save to default |
This menu option will set all of the current Midi CC, Midi Key, and Plugin Host parameter mappings to widgets in this Modular Synth Panel as the mapping defaults to be used whenever a new panel is added, or when the current map is replaced by the Set from default option in this menu. This feature is useful to avoid tedious repetitious remapping of parameter controllers. |
|
Export to file... |
This menu option opens a file save dialog which will allow all current Midi CC, Midi Key, and Plugin Host Parameter mappings to widgets in this Modular Synth Panel to be saved as an XML state file which may in turn be later loaded using the Import from file... option in this menu. This feature is useful for saving map templates to your favorite midi controllers. |
|
Set from default |
This menu option will first clear any parameter widget mappings into the current Modular Synth Panel, and then replace them with whatever mapping set has been set to default using the Save to default option in this menu. This action may not be undone. |
|
Import from file... |
Clicking this menu option will first clear any parameter widget mappings into the current Modular Synth Panel, and then invoke a file open dialog which may be used to select a type xml midi map file with replacement mappings. Such a file must have been previously created using the Export to file... option in this menu. This action may not be undone. |
|
Clear all mapped |
Clicking this menu option will clear any parameter widget mappings into the current Modular Synth Panel. This action may not be undone. |
|
Midi auto map |
Clicking this option opens the Midi Auto Map Submenu. |
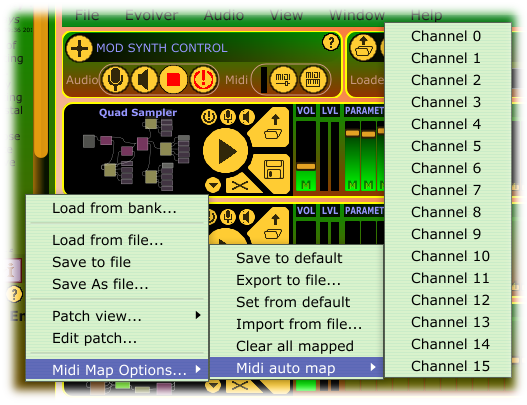
This
submenu really serves as a place-holder for future standard
midi-mappings applicable to specific Midi input devices. For now its
only function is to establish an automated mapping of Midi CC values
and keystrokes from the selected midi channel to the Modular
Synth Panel. The precise fixed mapping is proprietary to Darwin
Arts, and intended for future open source hardware projects. Watch
the Darwin Arts web site and
the web version of this user guide for new developments.
A set of midi, keystroke, and parameter mappings persists within the Modular Synth Panel in which it was created using the mapping tools described in previous sections of this page. Modular Synth Panel states, are in turn, saved as Presets.
Note that Midi mappings to a Modular Synth Panel are independent and separate from any patch loaded in that panel.